A Light and Easy Grape Salad Everyone Will Love

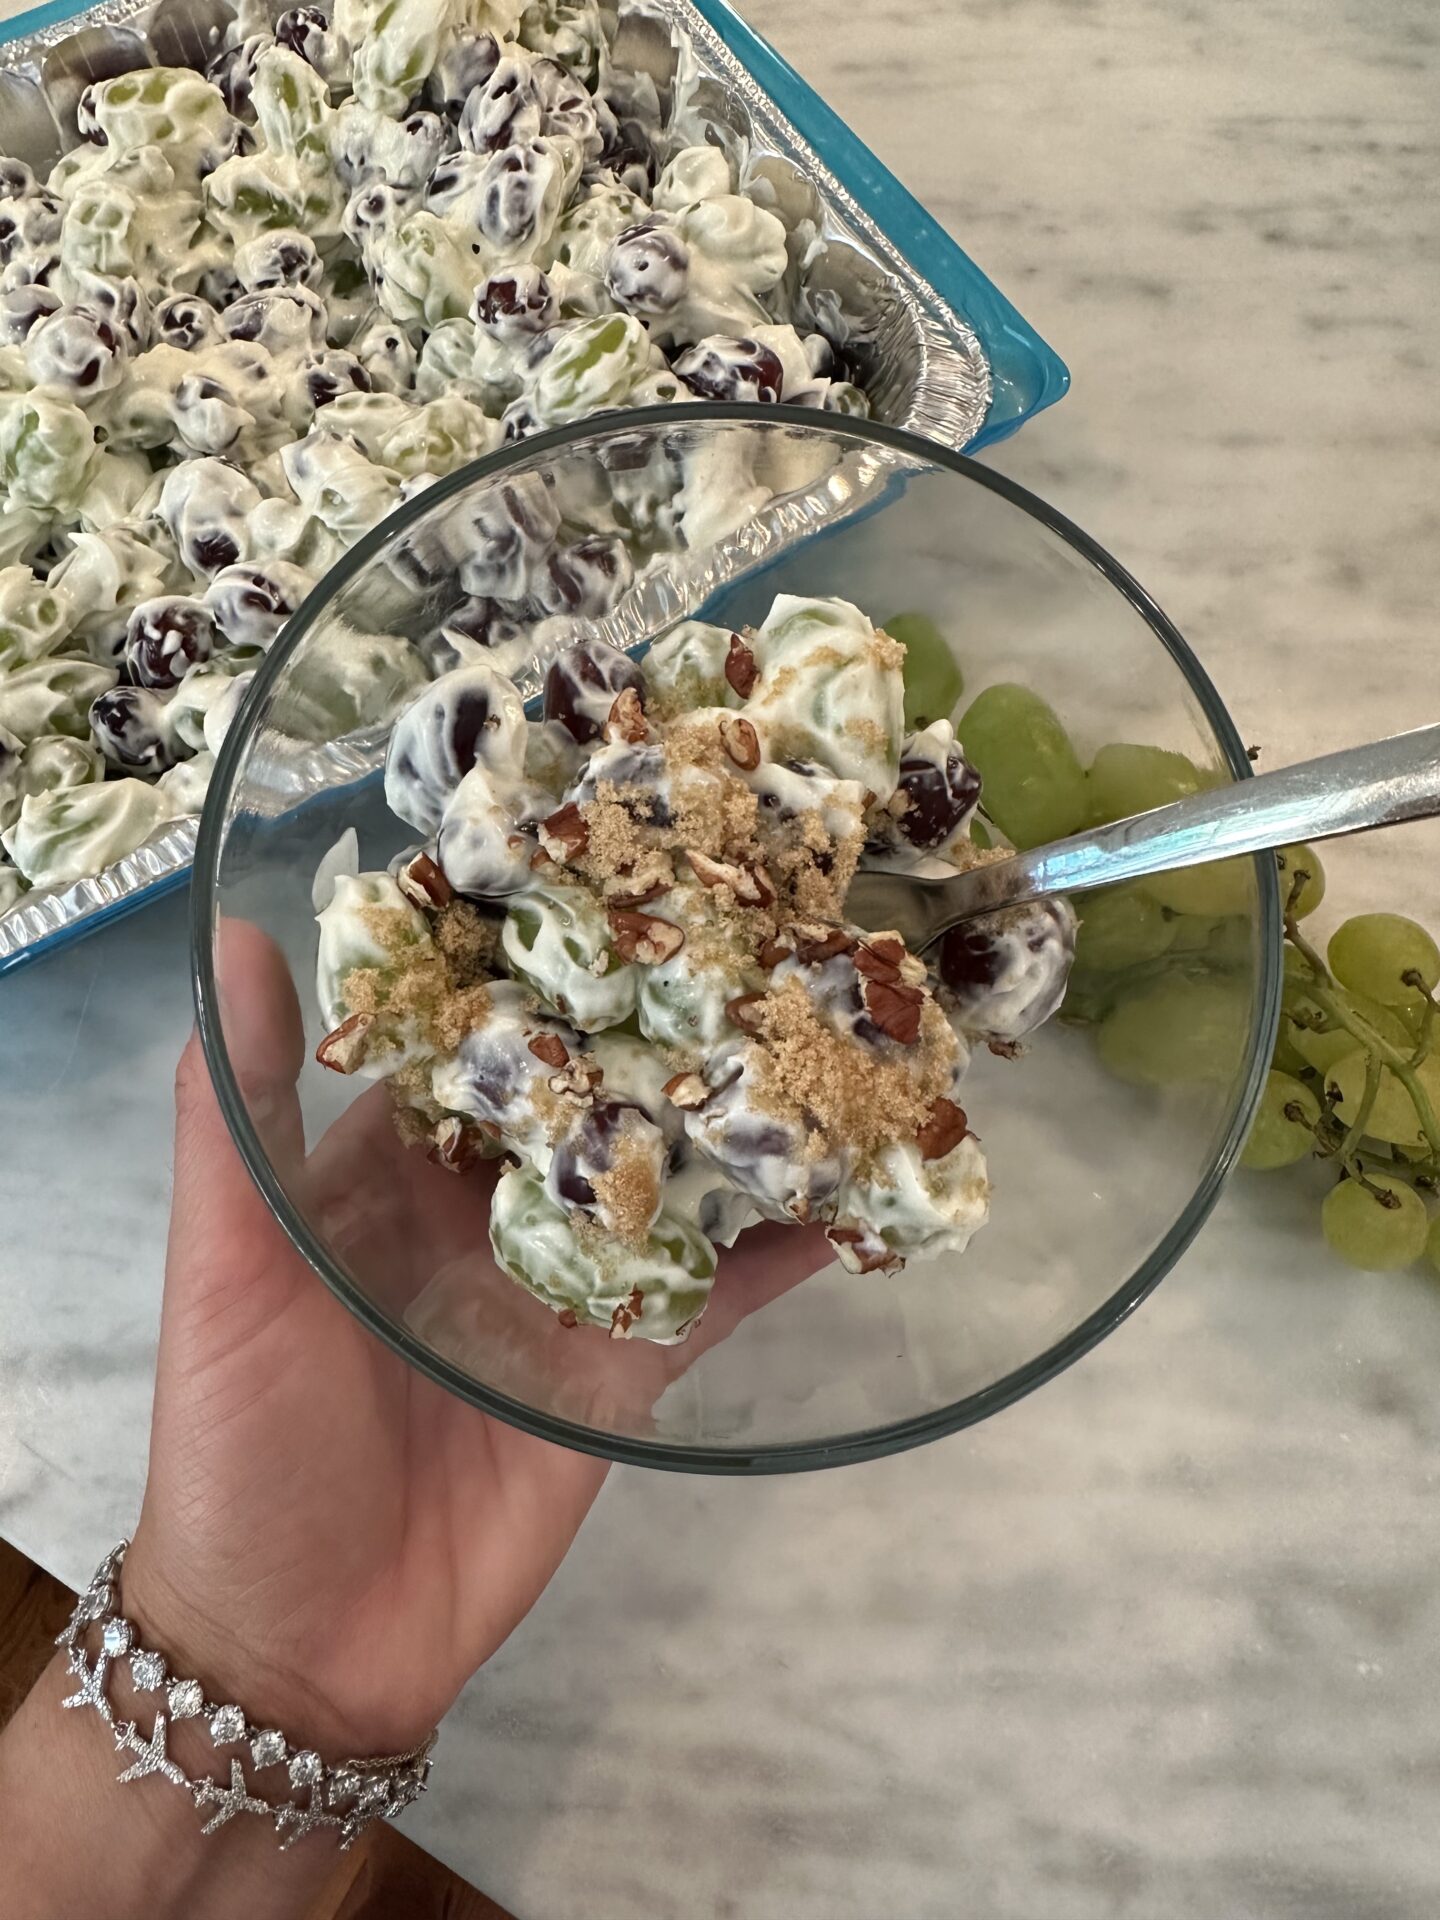
If you’re looking for a dish that’s both easy to make and a crowd pleaser, look no further! This Grape Salad is the answer to all your potluck problems. You know those moments when you’re expected to bring a dish but you have no clue what to make? Enter this colorful and creamy concoction, and let me tell you, the blend of flavors and textures is nothing short of magical. It’s the perfect balance of sweet, tangy, and creamy. I love this Grape Salad recipe (if you can even call it that because it’s truly that easy to put together) and it makes the best light dessert when you’re in the mood for something sweet but not too heavy. 

Ingredients You’ll Need:

  • 4 pounds of whole grapes (Can use any type of grapes, but I prefer mixing seedless green and red grapes for a colorful effect)
  • 8 ounces of cream cheese (This will be the base of the creamy dressing for our salad)
  • 1 cup of sour cream (If you’re not a fan of sour cream, substitute with plain Greek yogurt or vanilla yogurt for a healthier twist)
  • 1 teaspoon of vanilla extract
  • ½ cup of white sugar
  • 3 tablespoons of brown sugar

Kitchen Tools You’ll Need:

  • A mixing bowl
  • A serving dish/bowl
  • A whisk or electric mixer
  • A measuring cup and spoons
  • A rubber spatula

Instructions: Making the Dreamy Creamy Grape Salad

  1. Wash and dry the grapes: Before you start, make sure all the grapes are clean (I like to soak mine with a little bit of baking soda, it makes the grapes last so much longer) and thoroughly dried. You don’t want any water diluting the creamy goodness!
  2. Make the creamy dressing: In a mixing bowl, combine the cream cheese, sour cream (or your preferred substitute), vanilla extract, and white sugar. Whisk or use an electric mixer until the mixture becomes smooth and creamy.
  3. Combine the grapes and dressing: Gently fold the grapes into the creamy dressing with a rubber spatula, making sure every single grape is coated with the delicious mixture. Don’t be too rough while mixing as you don’t want to bruise the grapes.
  4. Transfer to a serving dish: Once the grapes are evenly covered in the creamy dressing, transfer the mixture to a serving dish.
  5. Sprinkle with brown sugar: To add a touch of sweetness and a slight crunch, evenly sprinkle the brown sugar on top of the grape salad.
  6. Chill before serving: For the best results, let the grape salad chill in the refrigerator for at least 2 hours before serving. This will allow the flavors to meld beautifully and will make the dish even more refreshing.

Note: If your grapes are very ripe, feel free to reduce the amount of sugar you add to the recipe — just remember to taste as you go.

And that’s it! Your easy and always-a-hit Grape Salad is ready to impress your guests! Let me know if you try this one!

Share:

The Perfect Spicy Rigatoni – A Taste of the Hamptons at Home

We first tried this spicy rigatoni at Sisi in the Hamptons and it was one of the most amazing pastas I have ever tasted. It really left a lasting impression and I knew I had to try and recreate it. I am thrilled to share the amazing results with you, along with some personal twists!

What You’ll Need – Ingredients & Tools

Ingredients:

  • 1 lb of rigatoni
  • 2 cups of heirloom tomatoes, chopped
  • 1 cucumber, diced
  • 1/2 cup of taggascia olives, pitted and sliced
  • 1/4 cup of red onions, thinly sliced
  • 1/3 cup of barrel-aged feta cheese, crumbled
  • 2 tbsp of fresh oregano, chopped
  • 1/2 cup of Calabrian chili paste
  • 1/2 cup of vodka
  • 1 1/2 cup of tomato sauce
  • 3/4 cup of cream
  • Salt and pepper to taste
  • Olive oil for cooking
  • (Optional) Fresh basil leaves for garnish

Tools:

  • Large pot
  • Colander
  • Skillet
  • Stirring spoon

Let’s Get Cooking – A Step-By-Step Guide

  1. Boil a pot of water with a pinch of salt and cook rigatoni according to the instructions on the package. Once cooked, drain and set aside.
  2. In a skillet, heat about 1-2 tbsp of olive oil over medium heat. Add the onions and cook them until they are translucent (about 3-5 minutes).
  3. Add the tomato sauce, Calabrian chili paste, and vodka to the skillet. Let it simmer for about 5-6 minutes. The sauce should start to reduce slightly.
  4. Stir in the cream, season with salt and pepper to taste, and let the sauce come to a simmer before lowering the heat. Allow it to cook for another 5 minutes and add basil leaves until it thickens.
  5. Toss the cooked pasta into the sauce and mix until it’s perfectly coated.
  6. In a separate bowl, mix together the chopped heirloom tomatoes, cucumber, taggascia olives, red onions, barrel-aged feta cheese, and fresh oregano. This will be the Greek salad that pairs wonderfully with the spicy rigatoni. PS it tastes so much better in these bowls, I can’t explain it but trust me.

Remember to save some vodka for a post-dinner treat to celebrate your culinary skills!

So there you have it, a taste of the Hamptons transported to your very own kitchen! I’d be thrilled to hear your thoughts on this recipe, and any variations you’ve tried (and loved). Share your experiences and let’s make this world a spicier place together!

Bon Appétit!

Share:

Assembling the Perfect Easter Charcuterie Board

I am such a huge fan of the grazing table and charcuterie board trend! It’s so fun to put a different spin on it for different holidays and occasions. My most recent is this beautiful Easter grazing board that features bunnies, blooms, and berries. With candy, cheese, fruit, and cookies, this is the perfect snack for any Easter gathering.

To assemble the board I like to start with the biggest items first the work my way to small fruits and candies to gradually fill in space. Use cookie cutters on cheese slices for extra flair, and then add flowers or greenery as finishing details. The final step– ENJOY! A special thanks Froth & Bubble Co. for the help! Head on over to my Instagram to see the video of assembling this swoon-worthy board!

*Bonus* Use Easter themed mini waffle makers to make a breakfast/brunch friendly board OR use large cookie cutters to add finger sandwiches for the kids.


Share:

In My Amazon Cart: Top 10 Fall Picks

We are one week away from October…HOW?! I’ve pulled out my pumpkin decor, but now it’s time to go full-on fall ladies! From the kitchen to the closet, here are a few of my recent Amazon favorites that are helping me do just that.


Shop all of my amazon finds on my Amazon Shop!
What are your fall must-haves this year?… Tell me your faves in the comments!!

Share:

4th of July Inspired Candy Board: Sweets for a Summer Celebration

IMG_0062

4th of July is just around the corner and it’s time to get your patriotic decorations out! There are so many things that you can do for this holiday, but I’m going to focus on a sweet treat. This 4th of July inspired candy board will be a hit at any summer celebration.

IMG_0063IMG_0064

Full disclosure: The 4th of July is one of my all-time favorite holidays! Between boats and hot dogs and fireworks… what’s not to love? I pulled out my red, white, and blue a little early this year and went all out on this candy charcuterie board. To be honest,  I could snack on this all year long! I’ll take any excuse to eat cheese and popcorn as a real meal.

Be sure to check out my IGTV to watch how I assembled this board!

IMG_0069IMG_0068IMG_0066

Share: